I am just a hobbyist, not a professional painter. I don't have air brushes and fancy equipment.I know you will get great tips from the professionals here on the Cabe, as we have a great "Cabe Crew", that know everything you need to do a great job! This is what I do: First, a solid base coat. I paint a frame, and that primary coat,[ the finish coat] has got to be applied correctly and cured. I'll let the frame set a month or more, no less, before doing anything. You don't want your base coat crinkling up while you are applying your graphics. You don't want you base coat peeling up when you remove your masking tape.
The frame has to be firmly supported if you intend to do the whole thing at once. Sometimes I do one side at a time, by laying the frame on a table. I do one side, and a week later, I do the opposite side. I don't rush.
By securely supporting the frame in a stand, you have access to both sides. My stand is from 1970 and it is heavy duty, and the is no movement once the frame is locked in.
I clean the frame, to make sure no grease, dust or fingerprints are on it prior to masking.
Use the narrowest tape. 1/8 - 1/4 inch. After it's down, I go over "all" of the edges and press firmly down just prior to painting.
I use a good brush, no cheap ones and most important, " One Shot" brand paint. I think it's the best made. It's not cheap, but results are fantastic.
As soon as it's done , while wet,

I remove the tape, all of it. You have to be patient and careful. An Exacto knife blade works best to lift difficult small pieces of tape up, without smudging your paint.
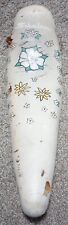
I keep cotton"Q Tips" handy. I dip them in solvent and tightly twist the cotton end. Use them to "fix" up any errant lines, or excess paint. These bikes below, aren't show bikes, but daily riders that I still own. The green ranger is on the stand in my shop now. Last photo shown is a before picture. I have been looking for the Westfield chain ring that goes on it for a month now. God knows where I put it.
View attachment 791464 View attachment 791465 View attachment 791467 View attachment 791468 View attachment 791469 View attachment 791470 View attachment 791471