


FreedomMachinist
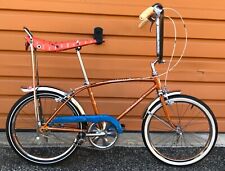
Finally riding a big boys bike
I think France still has some quality Oak forest left so they should have enough to cope.
Here is the answer, didn't even have to look for it, LOL, I still had that article open up in a browser tab from yesterday
France no longer has trees tall enough to rebuild Notre-Dame's roof as it was
The cathedral could be rebuilt with smaller beams or a metal frame. But purists will want Notre-Dame to remain true to the original design.
It looks great, have you dared ride it?
You know, for me, one of the best moments when working on an old machine, especially after having received it incomplete, is the first time you turn the bike around and see it standing on its feet again.
And the second best moment is to actually ride it, and so far I succeeded in getting all my machines into ridebale condition - since European machines tend to have steel rims and separate inner tubes, this goal is easier to achieve than with US-machines
")
So that was my goal for the Huseby: at least make a test ride to feel what it was like to ride it - it is a very tall machine, in fact by far the tallest one I own, and all the newly made parts were heat-treated etc. to accommodate that plan.
The bike seems to have been stored dry - the wood feels strong (and the bike is very heavy by the way).
However, there are two critical details, which I was aware of before buying the bike: The upper top "tube" had a app. 5" long split, but it did not reach very deep. I filled it up with "wood cement" , mixed to the correct color, so from that perspective I'd say I'm safe.
The second area of concern is the the right seat stay (wood rod from the seat post down to the rear wheel drop out). It is lose, you can pull it out of the lug by about 1/4". It could be cemented in with the same stuff I used for the crack in the upper tube, but I left this part open to show the bike to a carpenter once the other aspects of the bike are completed.
So, when the machine was standing on its wheels again and I was adjusting the play of the head set, I could feel something giving way, a little wobble of the upper wood rod: the connection to the front lug is not tight anymore. FYI: Each rod is secured by a bronze pin, with the head being about 7mm in diameter- so I assume the pins are 6.35mm (1/4") and hammered flat to 7mm, to rivet the joint together.
The relative movement of the joint is very minor, you have to put your finger over the intersection to feel it, probably not even 0,25mm (0,01"), but it is there.
So now comes the really bad part:
The gap is so small that very likely no cement may be filled in, not even with a syringe (and also: I'm not really a friend of such a cement-repair) .
Either way: I'd need to take the joint apart to see what's going on - since it is a diamond frame, I'd need to bore out all rivets on all lugs of the "diamond", just to get to the wood rod out that has the bad connection.. since the rivet is still sitting tight:
, very likely the wood inside has worn.
Under a certain light, you can see grey wood, which came out the lug:
other lug-intersection do not show this gap..
I'm showing a few more of these close ups - they make some color visible which cannot been seen on a "normal" photo,
I'm wondering if there was some kind of ornament, similar to Jesse's bike ...?
And: I don't really want to replace any of the rods... I can't even purchase Rock Elm
And riding it the way it is, even just for a test ride is not really an option: I could not enjoy the trip, always thinking about possibly breaking this beautiful frame, and if that happened, I'd be literally crying.
So, sadly, I'm at a point where I will probably never ride this fellow, which is kind of hard for me to accept.
Either way I'll take it to a carpenter and see what he has to say, but I'm not expecting too much from that.
So that brings us to your next comment:
Why not look into 3D printing a complete set of lugs for a full frameset?
I think you might have people interested in building replicas to ride.
Great idea - I thought about this as well, not for other people, but for myself (I have to admit). But of course I'd be happy to share that experience.
3D-printing metal is delicate, printers which do that are very expensive as far as I know.
But, a much better option and closer to the OG-design, would be casting the lugs.
The good thing:
The material which Huseby had in use is really easy to cast with hobby-equipment (just 660°C/1200F are needed for alunimum and 900°C/1675F for bronze) - You Tube is full of it.
So this is how it works:
1. Modell the part in 3D and print it out
2. Arrange the part in a split form in molding sand, in the "usual way"
3. heat up the bronze and pour it into the mold
4. the liquid bronze will burn the plastic away and take the shape needed (maybe some experimenting has to done here for proper burning printing material)
5. to make the molding process easy, no inner cores are needed. Just molding a solid part, so the last step would be:
6. Bore out the holes
I have not done this yet, but already 3D-modelled some parts and bought the molding sand, a electrical air blower and fire clay bricks.
The nice thing: any cheap 3D-printer will do the job.
 Actually I traveled the world quite a bit, but never made it to England yet.