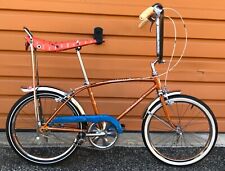
Installment #4: Rebuilding the New Departure Model D Coaster Brake Rear Hub
First, a big shout-out to The Random Mechanic in Texas who has a very good tutorial on YouTube on how to rebuild the "dreaded" New Departure Model D.
Banging around on the internet, I was also able to find images of a New Departure Sales and Service Manual published by General Motors, probably in the 1950s (ND was a division of GM by then.) It covered the Model D and "Twin Streak" rear hubs and Models W, WL and Y front hubs with exploded views and a complete parts list which allowed me to order NOS and used parts on eBay with specificity. I ended up needing to replace a slightly chewed D-12 Transfer Spring and D-7 Axle Adjusting Cone which had some significant spallation of the bearing race.
First off, as a Mechanical Engineer, let me say that the design is ingenious. It combines features of a disk brake with those of a cone clutch. When you pedal backwards to brake, very coarse threads on the "driver" attached to the sprocket push the base of a cone-shaped assembly made up of a "brake clutch' and "clutch sleeve" to the left into a stack of discs alternately splined to the hub or keyed to the shaft providing the braking friction between the rotating hub and non-rotating axle. That's what the external "brake arm" attached to the frame with a strap is for - to keep the axle from rotating. When pedaling forward, the clutch sleeve is drawn to the right into the taper inside the hub housing thereby rotating the hub in the forward direction. When you're not pedaling or braking, the transfer spring lets the clutch sleeve float away from the taper and everything freewheels. How someone* figured this out is beyond me. Very compact.
*It looks like patent
US850077A was awarded on 9 April, 1907 to one Harry Pond Townsend of New Departure Manufacturing Company, Bristol, CT. The most important lesson here is there were many people smarter than you or I working on things years and years before we were born.
On to the rebuild: I take it all apart with reference to the cross-section and exploded view in the service manual and with information from the video. I let everything soak in mineral spirits overnight, which damages the "blackout" paint on the hub and brake arm. I repaint them with gloss black Rustoleum spray paint, but I want to retain the eggshell white filling the lettering. On the brake arm this is easy enough. The lettering is deep and, once the black is cured, I dab in a little of the white with an artists brush applying just enough to fill the letters. I then gently wipe over the letters with a tightly folded paper towel soaked in some mineral spirits. You need a deft touch here - too little pressure and you'll smear the white over the black. Too much, and you'll wipe the white out of the letters entirely. Things don't go so well on the hub which is cylindrical and harder to wipe off cleanly. Also, the lettering is struck heavily on both ends and lightly in the middle, so I can't get an even fill. I end up repainting the black and carefully scraping out the letters and deepening them somewhat with an ice pick and gasket picker before more-or-less successfully filling the letters with white. There's a bit of a light haze of white around the letters, but it looks pretty good. On the unpainted parts I use an old toothbrush and toothpicks to dislodge any hard, stuck-on grease, give them another overnight soak in mineral spirits followed by a hose-off with Brakleen. Next I glue some 400 grit paper to a piece of plate glass, wet it down with a little dish soap and water mixture and go to town on the disks until the glaze is off of them and the scratches are minimized. Some of them have some deeper circumferential scratches where grit got entrained. I don't bother to polish the deeper scratches all the way down. I figure they'll just reduce braking efficiency a bit, but not as much as if the disks get too thin and deform. I finish up with 1000 grit and Band-Aids for my missing fingerprints. Recommend you wear gloves. I stack up the disks with a thin coating of grease in between them. The manual recommends "hypoid lubricant" be used between the disks, "automotive grease" on the bearings and "#3 cup grease" (Vaseline?) on all other parts. I use automotive grease on everything under the theory that after a few panic stops, the unit will be so hot everything will be incorporated together, anyway. I'll use hypoid gear lube in the oiler port in service. The manual and the video show 17 disks with a non-splined (shaft-synched) disk on either end of the stack. But mine has 24 with a splined (hub-synched) disc on one end. Hmmm...Dad must've worked on this. In any event, I want to keep all the original fabric flying in formation, so I order up a used set of discs on eBay and add 1 non-splined disc to the end. 25 total. All this means is that it won't take as much backwards pedal throw to engage the braking. This could be a good thing, especially if the discs are worn thin. I can't find a recommended stack dimension, so I stack up the discs and move on. The Random Mechanic doesn't rebuild the sprocket end as he's unable to separate the sprocket from the driver. Mine comes apart easily, so I'm able to better clean and repack the right side bearing and everything under the dust cap. The manual says there is a special tool to keep the disk splines aligned as you put them back into the hub, but I wouldn't know how to find one and, anyway, the grease sticks the disks together well enough that alignment during assembly into the hub isn't a problem. By the way, on the first test ride I slam on the brakes going down my driveway. No squeaks and I nearly go over the handlebars. Some pictures:

Before disassembly
The disk stack on the disc support sleeve (D-22)
The cleaned pieces laid out with bearings greased and wrapped
The disc stack installed on the axle
The NOS axle adjusting cone (D-7) (left) next to the original spalled part (right)
The NOS and original axle adjusting cones (D-7)nose to nose for comparison. Note the spallation on the original part (bottom)
Close-up of the brake arm on the axle assembly
Axle stack sub-assembly inserted into the hub in the laced rear wheel
I love the eggshell paint in the lettering. Makes it pop. Note my atrocious gold pinstriping. Wait for the installment on painting the frame. It gets worse...
The arm and the hub together again. I think the painted letters came out acceptably.