When you click on links to various merchants on this site and make a purchase, this can result in this site earning a commission. Affiliate programs and affiliations include, but are not limited to, the eBay Partner Network.

1953 Ladies Trojan Super Refresh

#eBayPartner    Most Recent BUY IT NOW Items Listed on eBay
eBay Auction Picture
I like to see ladies bikes saved.
Me too for the simple fact If nobody does they'll end up being none left.

It's like some 4dr cars; some are just so cool because it says Family man cruiser during the week but can be a Hot Rod or undercover Sleeper! I love the old station wagons 'cause their all around haulers; 3 deep in the front seat, 3 deep in the backseat & room for a cooler, tools or parts/projects in the wagon. I miss an old Ford LTD Country Squire I had with a True 400 that had original 11,500 when I got it for $409. Sold it at 14,500. Was a '70s typical creme faux wood grained exterior with the '70s brown interior but it was a unique beast
 
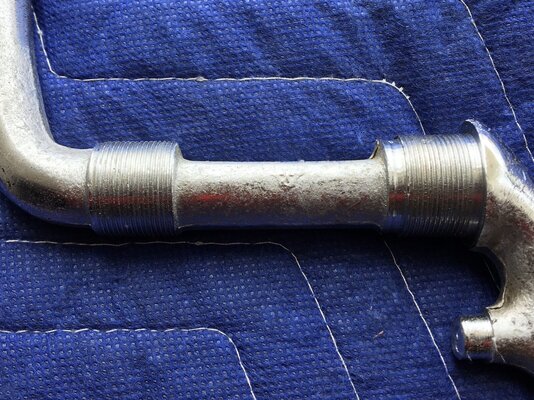
Okay, time for an update. I got the bottom bracket / crank / chain ring done between last night and this morning. I have about 2 hrs into it. The chrome is still a little pitted, but overall it's pretty good.

Lesson learned on this one. I went at the chrome on the chain ring a little too hard with the 0000 steel wool and left some scratches. I need to concentrate on having a lighter touch. Barely noticeable, but they're there.

1381228

1381230

1381229

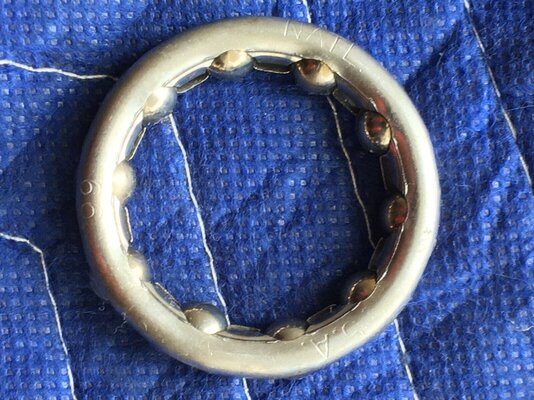
Some markings to report. The bearing races are marked NATL. S.A. 99. The only marking on the crank is what appears to be a W.

1381231

1381232

Also, check out my "soaker." It's a 1/9 size 6" deep food pan from a restaurant. The base is exactly the right size for two BB bearing cups to sit side by side. Perfect for soaking and using the minimum amount of material, in this case Purple Power. I can soak all the BB parts in about 1.5" of liquid.

1381234

After soaking overnight I gave the bearings a quick brush in the nooks and crannies with an old toothbrush, returned them to the soaker, and using two fingers quickly agitated the bearings back and forth for about 20 seconds. They came out like new with very little effort and the minimum of material used.

Products and materials used were nitrile gloves, an old toothbrush, a brass brush, 0000 steel wool, Purple Power, WD-40, and Turtle Wax Chrome Polish.

E=-)
 
Last edited:
Got the BB assembled (30 min). I used Timken Automotive Wheel Bearing Grease. Judging by the color & consistency I think it's the same / similar product as Lucas Red "N" Tacky. I have a Lisle bearing packer I use on automotive wheel bearings and it worked just as well on the cycle bearings.

The chain ring has a very slight wobble to it. Not sure if I should attempt to straighten it... Leaving it for now. Also, the pin on the washer was worn to the point where it rotated with the nut. I borrowed one from my '50 Mercury G-41.

1382033

1382032

These updates are kinda wonky and mundane, I know. It's as much a journal for me as it is something to share with everyone else. Still hoping someone, somewhere gets something out of it.

E=-)
 
Questions!

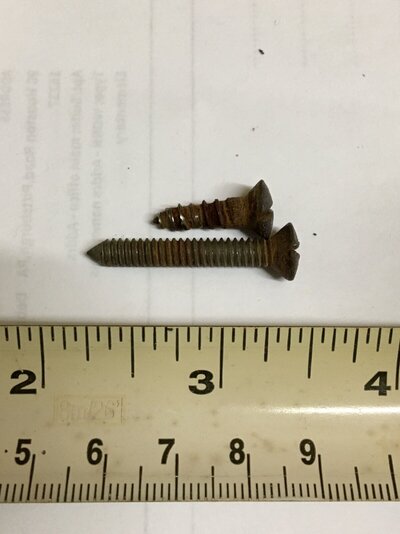
Here are some tank questions I was hoping someone could answer. The two screws and clip-on receivers that hold the tank halves together don't match. Can anyone share a pic of the correct screws and receivers for a '53+/- CWC tank?

1388174

1388177

1388178

The tank graphics are rough, especially on the left side. Somehow the "S" separated from the "uper" and slid to the left. Can those graphics be removed without harming the paint?

1388176

The left half also has the common truss rod dent. Any tips on how to roll that out?

1388175

Now the fork. The receivers that sit in the top and bottom of each fork spring don't match. the pair from the right side have round flanges while the pair from the left have flats on two sides. Any thoughts?

1388173


Here's where we are at the moment.

1388172


Thanks,
E=-)
 
Nice work buddy, the screw on the bottom should be the one, the top screw looks like a wood screw that they used as a replacement. I haven’t had much experience with dent removal just now looking into ways to do at home. Someone mentioned a bodywork nylon hammer and a sandbag. These items are easily available l have yet to give it a try. You may get the majority out with some thumb work. Hopefully someone has better answers. Really looks great love that Kirk Thomas. looking forward to seeing her all done.
 
Questions!

Now the fork. The receivers that sit in the top and bottom of each fork spring don't match. the pair from the right side have round flanges while the pair from the left have flats on two sides. Any thoughts?
I just saw this and I'm not sure if you figured it out but I thought I'd answer this question. The receivers that are round go on the top of the spring where the one with the flats go on the bottom. So you have the right stuff, they just need to be swapped from side to side.
 
Rubber or Nylon mallet, rolled up towel, sand bag & remember dents are removed the same they're made. I have gently tapped them out with anything firm from screw driver handles to blocks of wood to even using my knuckles to tap them firmly against a flat surface. Even compressed air when turned upside down and then suddenly a hot burst of air from a heat gun at max temp on thin body panels.

Sometimes you just have to be brave and or fearless 😎

You're already making it better than it was & doing a Good Job out of kindness/Love ....
 
I believe I used the same screws that are used in the Schwinn tanks with no problem. V/r Shawn
 
Three and a half months later...

An update! Getting close to the finish line. Everything is coming together nicely. I borrowed a couple bits and bobs from my '54 Pleasure Liner. I'm leaving the seat, tank, and headlight alone for now. Those will be smaller winter projects of their own.

I hit a roadblock with the wheels though. The chrome is gone. Just a dull grey is all that's left, and there's not much of that. The spokes are rusted and won't adjust. They're loose and bent and the front wheel has a pretty hard wobble. Not sure if I want to pursue a new wheel set or truly restore the set I have. I'd prefer to match the patina of the bike.

Any eastern OH / western PA folks have a decent early 50s CWC skiptooth wheel set? (Pic at the end of the post)

Thanks to @tacochris for the tire mock-up idea. Really helps you visualize the end product without the wheels.

Hoping to have this wrapped up soon so I can start on the Phantom. 👍

1435392


1435393


Please ignore the finger... 🙄

1435395


1435394


Here's the wheel profile.

1435406

E=-)
 
Back
Top