When you click on links to various merchants on this site and make a purchase, this can result in this site earning a commission. Affiliate programs and affiliations include, but are not limited to, the eBay Partner Network.

Laced My First Wheel!

#eBayPartner    Most Recent BUY IT NOW Items Listed on eBay
eBay Auction Picture
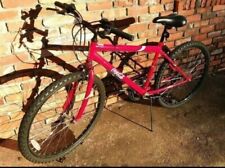
It's fun to learn something new, and provides a sense of achievement. I'm with Catfish, I forget after a while. When I do lace up some wheels, it ends up being several, one right after another. Then none for at least a year. I had the same feeling when I learned to re-cover saddles. I look for old rims and saddles at swaps. A pile of crummy looking wheels can be found at any swap, cheap. Their aren't many in our hobby that can lace wheels and few give them a second look. Look closely, there's always some gems that are nice and straight. I've bought bargain wheels for a buck each to salvage spokes, hubs and the longer brass nipples. It's nice to have a supply of re-furbished wheels and saddles for the next bare-bones frame you find. Don't get discouraged if you come out wrong or get messed up. Just pull it all apart and start over. My friend, the late Eddie Boros's wife used to lace wheels for Schwinn. It was piece work. Lois got paid 25 cents per wheel!
 
Complete newbie when it comes to lacing rims. Had two original triple drop rims from my 36 Colson that I wanted to maintain the patina on the hoop but be able to tru them adequately (many spokes were rusted/non-functional). Ended up removing all the spokes (saving all but a handful) and soaking them in CLR which cleaned them up really well. Then followed a few videos from youtube and after two attempts, got it laced correctly. My wife/kids were not sufficiently impressed by this feat so thought I would post it here. I'm going to do my donor wheel next when I get some additional spokes.
View attachment 1244810

View attachment 1244811

View attachment 1244812

View attachment 1244813
I worked in a bike shop for years and only built wheels twice. To say it's tricky is an understatement. Good job and on your first try. Outstanding
 
I enjoyed lacing a wheel a while back. It was not as difficult as I thought it would be with the help of youtube. I just went to the local bike shop with the hub and rim and they told me the length of spokes i needed which I then bought through Amazon as they were much cheaper. Congrats on getting it done. We are sufficiently impressed.
 
I enjoyed lacing a wheel a while back. It was not as difficult as I thought it would be with the help of youtube. I just went to the local bike shop with the hub and rim and they told me the length of spokes i needed which I then bought through Amazon as they were much cheaper. Congrats on getting it done. We are sufficiently impressed.

Hah. Youtube is awesome, exactly how I learned to rebuild a new departure model d hub.


Sent from my iPhone using Tapatalk
 
First one frustrated the heck out of me. Done a bunch since and now love lacing them up. Truing is a completely different story however, and I just can't seem to get the hang of it. Fortunately, I have a friend who doesn't charge an arm and a leg for just truing.
For reference, I keep a copy of pages 11-16 from this site: https://www.sheldonbrown.com/wheelbuild.html

Totally agree truing a rim is black magic.


Sent from my iPhone using Tapatalk
 
Lacing and then truing a wheel, while connected are very different. One is a basic mechanical assembly, and the other is a required visual geometry lesson with a push-pull example. Lacing all spokes loosely 1st will usually result in a true wheel in minutes, but only if your rim is already true and the new wheel is sitting in a good truing stand with the same amount of spoke threads left showing above the nipple. Now spin the rim and you will see it move all over the place. It is very important that at this point you simply finger-tighten (or loosen) the nips one by one equally as you spin the rim 360 degrees in the stand centering the rim as you go. Tighten or loosen the nips only with your fingers. Go around once to roughly center the rim in the stand. Do this two or three times using only your fingers. Then adjust the up/down, or "hops" in the rim the same way. Tighten or loosen in the high or low spots until visually spinning ok. Continue to use your fingers only! There will be times you will physically push on the rim while you do this to help tighten the nipple. Your goal wheelmen, is to get the rim as clean and hop-free as possible in the stand while using your fingers to tighten the nips. If you went the wrong way, go the other way until it is all finger tight and spinning relatively clean and hop-free.
At this point, you have tensioned every nip to the maximum with your finger tips. Now time for the wrench. Tighten each nipple 1/2 turn once around and check the spin. Still Look ok? Then one more 1/2 turn all around. Then go to 1/4 turns. If there are adjusts to make, they will be small, so make them as you do these 1/4 turns. Obsessing over a perfect spin may take a bit more time, but when you get perfection, it is very rewarding. Very small turns to the nips at this point make big differences.
 
Last edited:
Back
Top