


the tinker
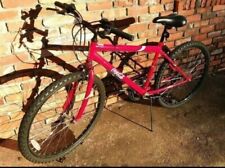
Cruisin' on my Bluebird
" Look....I need a saddle done in leather for the kid's cowboy bike and I need it before noon. Just get it done

"Pauli wants his kid's bike seat re-done today before lunch. Whatta we gonna do Henry ?
"I know Jimmy, that guy the tinker.....he's kind of a schlock but I bet he could crank one out quick


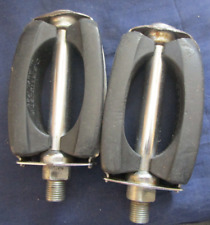
Crummy seats....we all got'em .....Take the pan apart and get all the rust off. & Re-paint if it needs it.
Grind off the spring rivet tops if the edges are sharp.

Always keep a knife with you...... not only for protection but when you see an old leather couch out on the curb stop and cut out any salvage leather off it. I keep a knife in both our cars. The light brown piece I got on the way to church.....time to do it is when you see it.

Those old heavy flannel shirts you got you're gonna use for rags....save em. Cut out a hunk large enough to wrap the pan with.
Cut out two other hunks each a little smaller and one little patch to cover the rivets.Cut them a little neater then the Tinker did......


First spray some upholstery glue[From Home Depot] on the pan and attach the small hunk of cloth over the riveted section.......
Then spray the entire top pan and underside edges with glue and tightly wrap the large hunk of cloth around the pan. Pull the edges tightly, folding them over the edges onto the bottom edge of the pan.
Repeat for each hunk of fabric.


Be a little neater then me..... I had to do this fast as I was afraid I was gonna get wacked if I didn't get it done quick.......
Next cut your leather.....and repeat ....I let the leather set on my hot truck dashboard in the sun while I was doing the other stuff to soften it up cause it has to be pulled real tight....Lastly install the bottom pan&bottom bracket.

Done...[.One hour and 45 minutes]. Take your time......buy the foam instead of the old shirts but hey, this is the Tinker here....... what can I say?? I got the photo sequence a little screwed up here but you get the idea.


View attachment 328680
"Pauli wants his kid's bike seat re-done today before lunch. Whatta we gonna do Henry ?
"I know Jimmy, that guy the tinker.....he's kind of a schlock but I bet he could crank one out quick
Crummy seats....we all got'em .....Take the pan apart and get all the rust off. & Re-paint if it needs it.
Grind off the spring rivet tops if the edges are sharp.
Always keep a knife with you...... not only for protection but when you see an old leather couch out on the curb stop and cut out any salvage leather off it. I keep a knife in both our cars. The light brown piece I got on the way to church.....time to do it is when you see it.
Those old heavy flannel shirts you got you're gonna use for rags....save em. Cut out a hunk large enough to wrap the pan with.
Cut out two other hunks each a little smaller and one little patch to cover the rivets.Cut them a little neater then the Tinker did......
First spray some upholstery glue[From Home Depot] on the pan and attach the small hunk of cloth over the riveted section.......
Then spray the entire top pan and underside edges with glue and tightly wrap the large hunk of cloth around the pan. Pull the edges tightly, folding them over the edges onto the bottom edge of the pan.
Repeat for each hunk of fabric.
Be a little neater then me..... I had to do this fast as I was afraid I was gonna get wacked if I didn't get it done quick.......
Next cut your leather.....and repeat ....I let the leather set on my hot truck dashboard in the sun while I was doing the other stuff to soften it up cause it has to be pulled real tight....Lastly install the bottom pan&bottom bracket.
Done...[.One hour and 45 minutes]. Take your time......buy the foam instead of the old shirts but hey, this is the Tinker here....... what can I say?? I got the photo sequence a little screwed up here but you get the idea.
View attachment 328680
Last edited:
