When you click on links to various merchants on this site and make a purchase, this can result in this site earning a commission. Affiliate programs and affiliations include, but are not limited to, the eBay Partner Network.

59 and 60 stratoflite bikes

#eBayPartner    Most Recent BUY IT NOW Items Listed on eBay
eBay Auction Picture

Spacecowboy

Finally riding a big boys bike
Recently picked up these pair of strato flites. The men's is 59 and ladies is a 60 as determined by the murray serial number project thread. As always, thanks for the info. Both rear rims are 59 by F&S date code B.
The ladies bike provided some needed parts that I just didn't have on hand for a Murray. I happened upon it on marketplace the week after I had bought the mens.
When I was cleaning the rear rims, found the factory grind marks. That's a guesstimate, as both bikes are nearly same year and all four rims had the same pattern of grind marks. I only got a picture of one but once I get back to them I'll add pics of all four marks, here for ya. I was bummed out until noticed it was on all the rims of two bikes I got more than 60 mi apart.
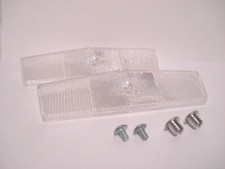
They're rollers right now, only one tire was a loss but i think the tube actually survived. I still have some basic maintenance to do before taking them around the block. Also will be working on getting the men's tank light back to operational. I'll skip adding the serial number pics as they're posted elsewhere on the site here.

Lol, oh I forgot which team used the baseball with mustache logo. Can't say that I know anything about the decals on the fenders, I just figure they were Topps or something out of bubble gum pack.

1771774084491.jpeg


1771774261148.jpeg


1771774721814.jpeg


1771774789269.jpeg


1771774853874.jpeg


1771774928412.jpeg


1771774973329.jpeg


1771775048954.jpeg


1771775410118.jpeg
 
Thanks, since you mentioned that I went to look them up on feebay and they both appear as 1961 fleer and/or double bubble water decals. Mr. Redlegs with the mustasche seems to have lost his mustasche sometime in the 70s.
1771798176833.jpeg
 
Last edited:
As promised here's the rim joining grind marks of both. Kinda of new thing to find out after mainly concentrating on schwinns, but learn somethingnew all the time.(They're at the 6 o'clock position, btw)
View attachment 2372223

View attachment 2372224

View attachment 2372225

View attachment 2372226

View attachment 2372227

View attachment 2372228

Those don't look too bad, you would think they would have polished them out before they plated the rims. In the old days ('50's) they probably would.
 
I just blame that on the new guy. Lol.

I made some progress with #0000 steel wool. I'm real hesitant to use a nylon wheel on the drill cause i wont be able to use that between the spokes. The guys rims had thin layer of oil or something, stored upside down in a garage, so they cleaned right up despite the rust. The ladies was from a barn, I was told.

The ladies front rim made it thru cleaning ok. the rear, from what I've seen is kind of good in comparison to whats for sale out there.

The only other time I've seen something clean up like the mens did was some rims where the bike was stored near a compressor. Which oddly is also a murray but those are painted rims. I'll have a separate post for that.
 
Last edited:
Project update, 59 mens stratoflite.

Pedals: ladies pedals also had one of the pedals with a bent axle, so took them apart and fixed the mens pedals, which also had bent shafts and missing jewels. Jewels re-seated, new axles obtained from other Wald pedals. After assembling, one was too loose, the bow shape of the pedal a bit off I guess, added a washer under axle to tighten it up. The loose axles seemed to have eventually caused the bent axles. Could've landed on the pedals too much.

Tank: swapping over the good battery tray/horn and switch from ladies didn't work. Since this bike happened to come with a generator, I decided to try that to test the bulbs, and lol it worked. Rewired lights to generator. Replaced 2.5 v bulbs with 6v incandescent but tail light still didn't work. Replaced generator tailight with an led bulb, now all work. Original tail light bulb was burnt out, but even a good miller 6v bulb didn't work in conjunction with headlight so went with the led. Can't take credit for generator swap thought, I saw someone else do one on bike for sale. The led taillight was a thing I found that always works after getting one.

Rear rack light: was missing lens, battery tray toasty. Replacement cost 65, instead bought led rack light for 10 bucks. I found it on ebay but I had to redo the attachment so i could use the original battery tray. I actually had a working one of these battery trays until i sold it. The tension for the batteries and thier alignment needs to be spot on to work. Too much vibration, etc makes them not work rather quickly. The original plan was to ditch the generator for the rack light, but things just worked out a different way.

If i can get around to it this week, I'll add pictures here of all lights working.
 
Last edited:
I attached a gif of a video, the mpeg4 wasnt allowed and was too big anyways. Did that attachment upload in the separate tab window Also included a still from the video of the headlights, just in case the video isnt allowed.
Cut the video down from 30s to like 6, and then the gif cut it a little more.

The tail light is a modern item I modified to fit the old roached out battery compartment. Its a short term thing mainly for the group slow roll nights.
1774053157839.jpeg


1774053396824.jpeg


20260320_195829_2_1(2).gif
 
Thanks, yea called company called "soldler"
I changed where the screws went by about 1/2 mm on each side it get it to into the original lens slots. Changed up the screws as well to a tiny #6 or something that I had rolling around my hardware box. Had leave just enough slack to slide onto the rear rack.
1774971002059.jpeg
 
Last edited:
Back
Top