When you click on links to various merchants on this site and make a purchase, this can result in this site earning a commission. Affiliate programs and affiliations include, but are not limited to, the eBay Partner Network.

ArtDeco eBike Build

#eBayPartner    Most Recent BUY IT NOW Items Listed on eBay
eBay Auction Picture

Fixedgear

Look Ma, No Hands!
Hello All,

I am an avid cyclist. I am a vintage car and motorcycle aficionado. I'm an artist and craftsman.
I have restored vintage cars and motorcycles but have never built a bike from scratch. Until now.

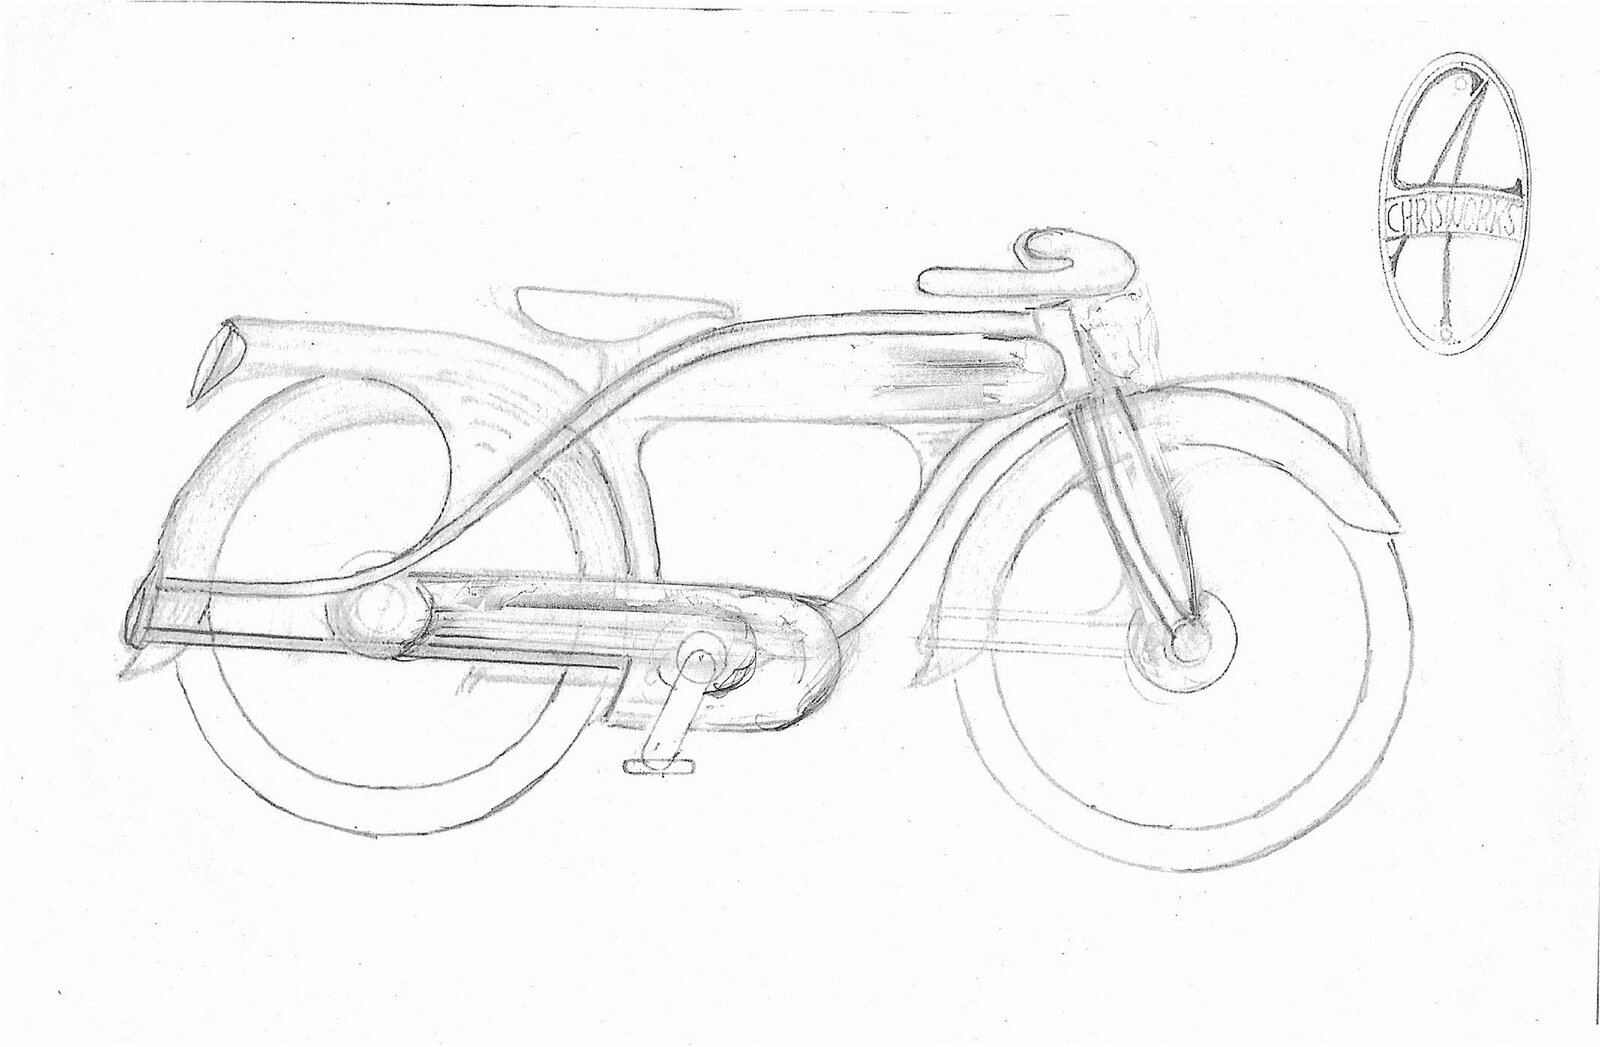
This is my build. It started out as a pandemic project on paper but I decided to make it a reality. My intention was to build a pedal-assist eBike with a mid-drive motor, Rohloff Speedhub, and Gates Belt drive. I studied bicycles and motorcycles produced in the late '30's and pulled elements from various models including the Elgin Bluebird, Dayton Safety Streamline, Shelby Speedline Airflow, and BSA Gold Star motorcycle. I set out to refine my drawing, dial in the geometry, and search for the right parts


Here is my journey.
Airflow#1.jpeg


Deco.Bike.Angles.JPG


Panel.Test.1.jpg
 
The foundation of this bike had to be the wheels and fenders. I found a vintage set of Monark fenders that defined the look I was after. I had CycleMonkey build a set of 650B wheels using a Rolloff Speed hub rear and a Paul Components front hub. I purchased Paragon Rocker dropouts and modified them. I fabricated mounting points with a chain stay break for the belt drive and went with a Bosch Gen 4 for the motor mount. I rolled various diameter chromoly tubing to get the shapes. At this point I knew I would need some expert assistance to give me a solid frame to work with. I enlisted master craftsman, Curtis Inglis, to take my drawing and make it a reality. He TIG welded the frame and fork. His work is amazing and the truss fork is icing on the cake!

Belt.Break.1.jpg


Belt.Break.2.jpg


Bosch.Gen4.Motor.mount.jpeg


Inglis.Frame.Fab.jpg


Super.Moto.X.JPG
 
Originally, I had envisioned a chain stay that carried out the back and wrapped around the fender just like the seat stay. I would then install a kick stand below. What evolved turns out to be a better solution. I fabricated mounting and swivel points off the rocker dropouts to incorporate a drop stand that carries out the back just like the original drawing. It works fantastic!

Drop.Stand.3.JPG


Drop.Stand.14.jpg


Drop.Stand.Mounts.2.jpg


Drop.Stand.Mounts.3.jpg


Drop.Stand.Mounts.5.jpg


IMG_0290.jpg


IMG_0297.jpg
 
The vintage fenders needed some attention. The rear fender need to be extended. I fabricated a section using an english wheel and bead roller then welded it to the original. The front fender had factory pressed indentions for the original narrow fork. I was able to hammer those out, shrink the metal while

Fender.Rear.Patch.1..jpg


Fender.Rear.Patch.4.jpg


Fender.Rear.Patch.6.jpg


Fender.Rear.Patch.10.jpg


Front.Fender.Stay.1.jpg
maintaining the original shape. The front fender stays I made were trial and error but I feel like the end result is perfect for the bike.

Artwork.2.jpg
 
The goal for the rear rack was to keep the battery mounted as low and far forward as possible. I wanted to incorporate the curves without competing with the flow of the seat stay. The end result holds true to the original drawing. This feature was influenced by the ’39 Elgin Miss America.

IMG_0229.jpg


IMG_0233.jpg


IMG_0235.jpg


IMG_0238.jpg


IMG_0243.jpg
 
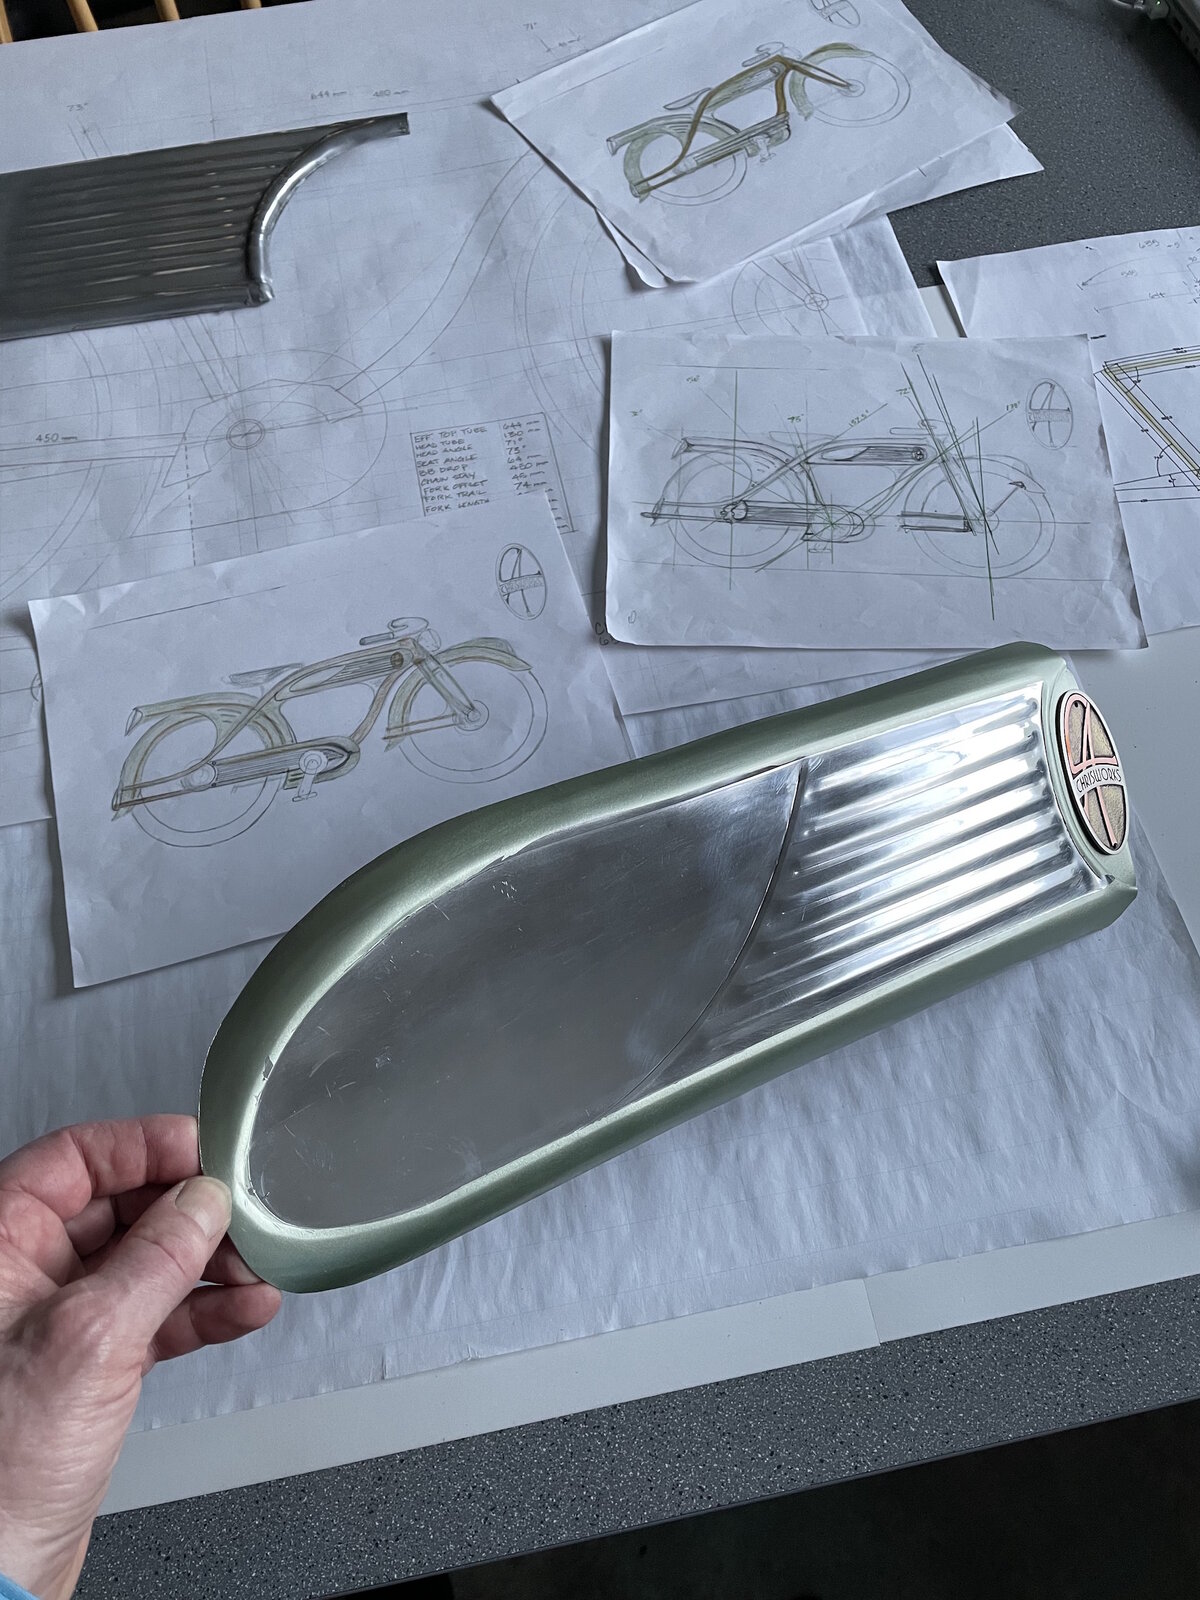
The aluminum bodywork is the key to the design of the bike. I set out to fabricate a buck for each piece before the actual metal shaping began. There are basically 9 unique panels that need to be fabricated. I found that each panel presents it’s own challenge and the sequence on how I shaped each piece was most important. The whole process was a bit of a learning curve but there is satisfaction seeing all of the work

IMG_0489.jpg


IMG_0518.jpg


IMG_0519.jpg


IMG_0669.jpg


IMG_0668.jpg


IMG_0675.jpg


IMG_0676.jpg
come together.

Twin.Tube.Cover.daft.jpg
 
Form Follows Function: The aesthetics of most all mid-drive eBike motors has always been a problem to me. The irregular and angular shape of the motors and mounts do not flow with the lines of a bike. There is no continuity of this shape with the rest of the bike. One of the main concepts of my original drawing was to encapsulate this mechanical necessity with a casing or shell that is aesthetically pleasing with the rest of the bike. Metal shaping these two center panels really sets the stage for the Art Deco feel of the entire build.

IMG_0287.jpg


IMG_0671.jpg


IMG_0677.jpg


IMG_0678.jpg


IMG_4147.jpg
 
Back
Top